
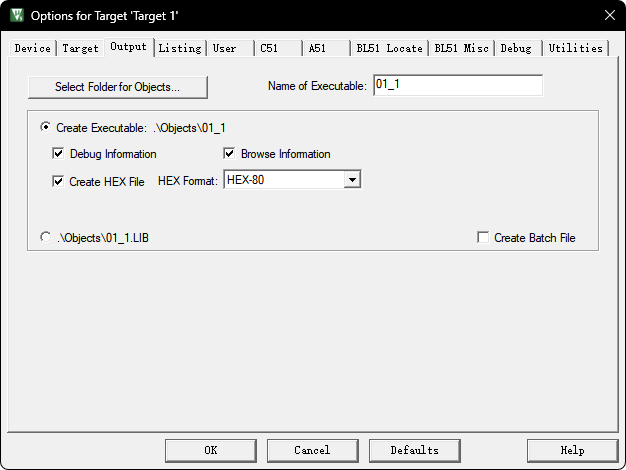
先构建空工程,并打开创建HEX文件的选项。
|
观察原理图可知K1按键由P31引脚控制,当按下K1时由高电平转为低电平,我们可以通过一个简单的判断语句来判断按键的按下和松开并做出反应,例如:
|
由于此处的独立按键相当于常闭按钮,所以在编译程序并下载到单片机后我们会发现按键在按下之后松开的瞬间,LED灯就会熄灭。要想实现按下按键让灯常亮,再按下一次按键让灯常灭我们就需要对代码进行适度修改。
这里提供一种思路:引入一个随按键每次按下而改变的值,通过这个值来控制LED灯的亮灭,实现按键的伪自锁(因为按键按下后就会松开,并没有保持按下状态)。
|
由于单片机的按键存在抖动(由机械触点的弹性及电气特性引起,在按下或释放瞬间会产生短暂的多次开关信号波动)。通常按键在按下沿与释放沿各存在约 5~10ms 的抖动,合计抖动时长约 10~20ms。在此期间,按键电平不稳定,单片机可能会将一次按键操作识别为多次触发,导致受控元件出现频繁通断、状态反复切换的现象。在这里表现为 LED 出现异常闪烁。像LED这样的小电流元器件可能不会造成什么影响,但若控制对象为工业上的继电器、电机等大功率或感性负载,频繁通断则可能造成触点烧蚀、器件过压损坏等不可逆影响。所以一般的类似程序都会对程序进行消抖,用于减少按键抖动的影响。
|
二、按键控制位移
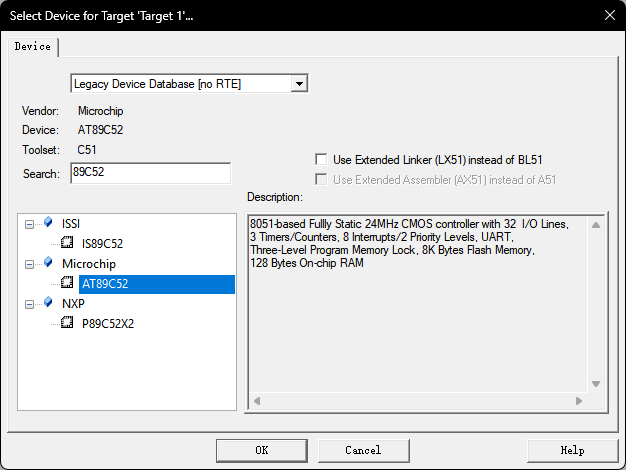
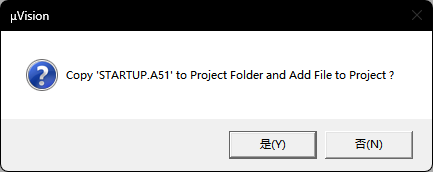
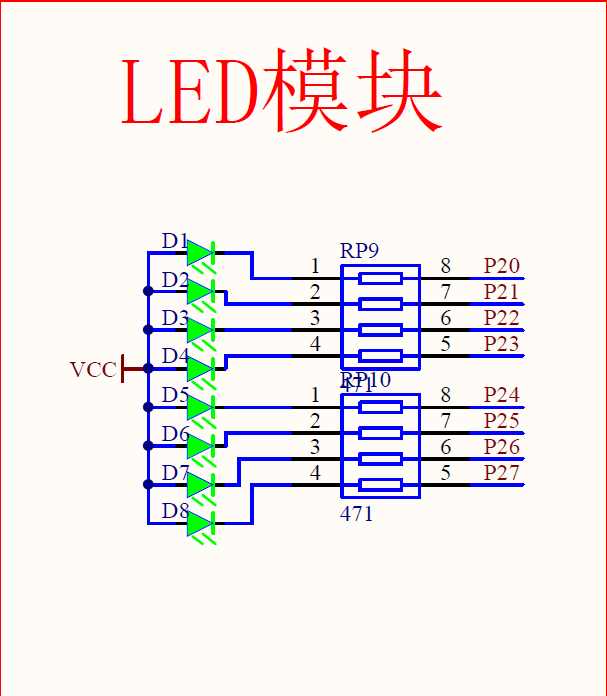
]]>1,keil uvision5 点此链接前往官网下载 2,STC-ISP 点此链接前往官网下载 tips:上述两程序均为完成本文时对应程序的最新版本,链接均指向官网链接 启动Keil,依次点击Project→New uVision Project,选择用于存储工程的文件夹并为工程命名。 随后会弹出选择单片机型号的窗口,本人单片机型号为STC89C52RC,这里选择MicroChip的AT89C52,实际请根据自己单片机型号进行选择。 选择完成后会弹出选择是否加入初始化代码询问的信息,此处通常选择“是”,初学者不知道如何修改启动代码可以选择“否”。 随后依次展开Project窗口的Tatget 1→Source Group 1,右键Source Group 1,点击Add New Item to Group ‘Source Group 1’,命名为main.c,写入如下代码: 这个工程编译运行后会让你的单片机回到初始状态。 将光标移动至main.c第一行void之前,右键打开菜单,单击**Insert #include<REGX52.H>**,也可自己在第一行输入 查看单片机LED模块原理图,可知 tips:此处为普中开发板LED模块原理图,不同型号单片机的原理也可能不同,请根据自己单片机型号查找原理图,建议询问自己购买单片机的店铺客服。且控制引脚高低电平有多种方式方式,这里以字节操作语句为例。 此处提供两个实例代码,并说明其作用: 显然这个程序可以通过一个由8位二进制转换而来的16进制控制单片机的LED灯,8位二进制的0代表灯亮,1代表灯灭,8位二进制从右往左对应单片机的从左往右。 要生成可在STC-ISP下载到单片机的Hex文件需要打开Keil uvision的Creat HEX File选项 打开STC-ISP程序,在工具栏找到软件延时计算器,自由设定定时长度,此处以500ms为例。 tips:注意选择自己单片机型号,此处为STC89 生成C代码并复制粘贴到keil uvision中,完成后续程序。 由四的LED闪烁我们可以直觉的想到可以让LED灯从左至右依次点亮后熄灭,以下代码可以实现: 这是一种极其原始的方法,代码繁琐但必定有效,更高阶一些的写法,如unsigned char可以让控制LED的八位二进制的高电平位从右往左移动,对应单片机LED灯从左往右依次点亮后熄灭,实现流水灯的效果。 1,keil uvision5
More info: Writing More info: Server More info: Generating More info: Deployment
二、创建空工程


void main(){

}三、点亮LED灯
#include<REGX52.H>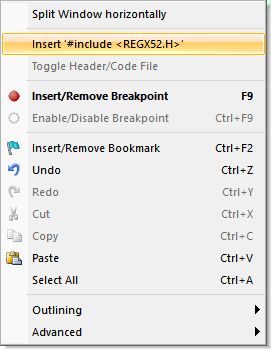
#include <REGX52.H>
void main(){
    P2=0xFE;
    //此处FE为16进制,转换为二进制为11111110,此代码可以点亮单片机LED模块第一个LED灯
}#include <REGX52.H>
void main(){
P2=0xFC;
//此处FC为16进制,转换为二进制为11111100,此代码可以点亮单片机LED模块前两个LED灯
}
四、Led闪烁
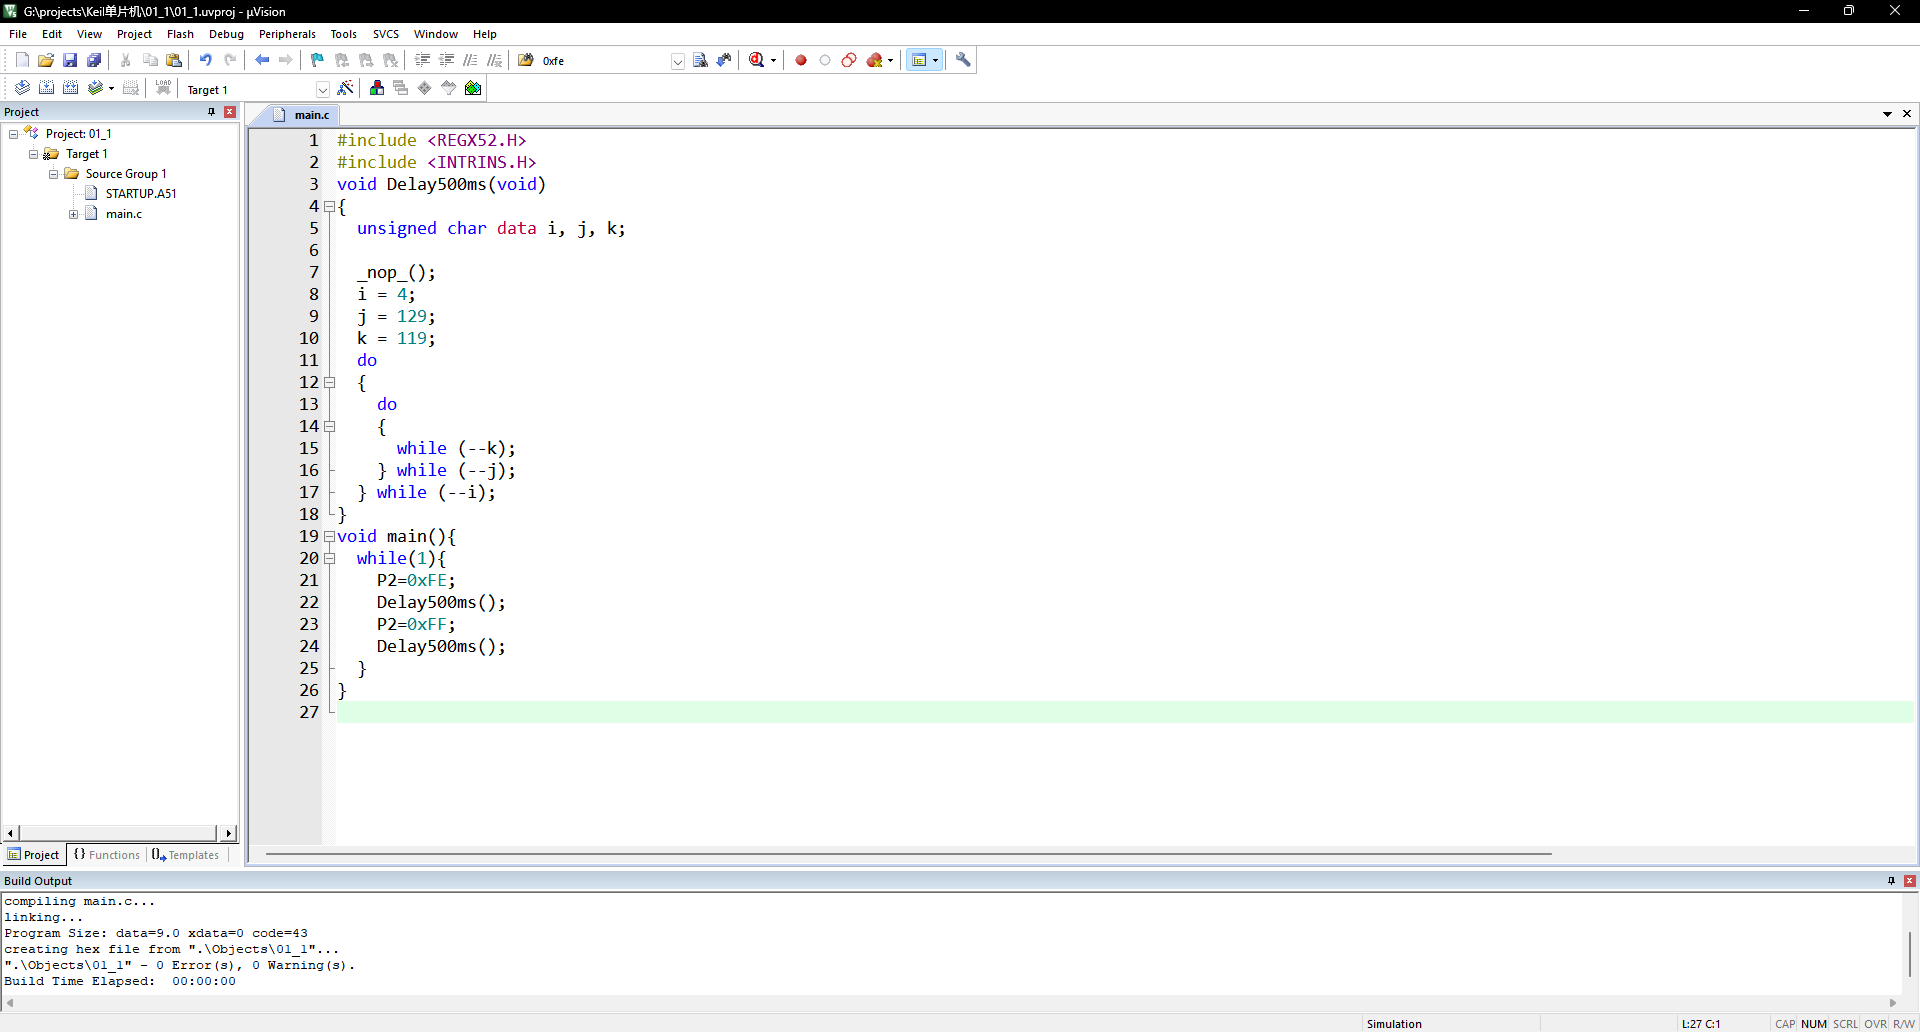
#include <REGX52.H>
#include <INTRINS.H>
// 此处库INTRINS.H为函数_nop_()所用到的
void Delay500ms(void)
{
    unsigned char data i, j, k;

    _nop_();
    i = 4;
    j = 129;
    k = 119;
    do
    {
        do
        {
            while (--k);
        } while (--j);
    } while (--i);
}
void main(){
    while(1){
        P2=0xFE; //点亮led灯
        Delay500ms(); //延时500ms
        P2=0xFF; //熄灭led灯
        Delay500ms(); //延时500ms
    }
}
五、LED流水灯
void main(){
    while(1){
        P2=0xFE; //点亮led灯1,1111 1110
        Delay500ms(); //延时500ms
        P2=0xFD; //点亮led灯2,1111 1101
        Delay500ms(); //延时500ms
        P2=0xFB; //点亮led灯3,1111 1011
        Delay500ms(); //延时500ms
        P2=0xF7; //点亮led灯4,1111 0111
        Delay500ms(); //延时500ms
        P2=0xEF; //点亮led灯5,1110 1111
        Delay500ms(); //延时500ms
        P2=0xDF; //点亮led灯6,1101 1111
        Delay500ms(); //延时500ms
        P2=0xBF; //点亮led灯7,1011 1111
        Delay500ms(); //延时500ms
        P2=0x7F; //点亮led灯8,0111 1111
        Delay500ms(); //延时500ms
        P2=0xFF; //熄灭所有led灯,1111 1111
        Delay500ms(); //延时500ms
    }
}unsigned char ucled=0x01; //0000 0001
void main(){
while(1){
P2=~ucled;
Delay500ms();
ucled<<=1;
if(ucled==0x00) ucled=0x01; //循环
}
}Quick Start
Create a new post
$ hexo new "My New Post"Run server
$ hexo serverGenerate static files
$ hexo generateDeploy to remote sites
$ hexo deploy